


Vista Weather Gadget is one of the gadgets that comes built-in with Vista, giving real time Weather conditions and forecasts through msn weather service. As many must have noticed till now, the Weather Gadget of Vista is experiencing a bug, and is down. Many a times, it shows the message "Service not available" when one wishes to see the weather forecast for tomorrow. Even if a place in North America is entered in it, it shows the same message, "Service not Available". It might be a temporary problem, or a major one, but a great substitute is available, that has better features than the original built-in weather gadget.
A huge number of sites provide patches for the Weather Gadget, but the thing lays that it is not necessary to patch or crack, but a better version is available, and if that is used, no harm will occur.

This gadget can be downloaded from here: Download Vista Weather Gadget Substitute
This gadget is just a modified version of the original Vista Weather Gadget, and has some enhanced features, like it shows a 5-day forecast in flyout, and has some modified settings too. It's simplicity in desing is most appealing, and it fits better on screen than Weatherbug, or other Weather Gadgets. It is a must have for all that loved the original Vista Weather Gadget, and the Yahoo Weather Widget.
Showing posts with label computers. Show all posts
Showing posts with label computers. Show all posts
What is Qemu?
Qemu is a Processor Emulator, which creates a Virtual pc with the amount of RAM or Hard Disk you allot. You can start your Virtual Computer just by clicking a single file.
Why use it?
You can have more than one computer running at a time, doing many works simultaneously.If you get any errors, or crash the Hard disk of your computer, you can just delete the Hard Disk image and create a new one.You can test any new softwares without crashing your real computer, etc, etc...
Steps for Downloading and Using Qemu:
Qemu is a Processor Emulator, which creates a Virtual pc with the amount of RAM or Hard Disk you allot. You can start your Virtual Computer just by clicking a single file.
Why use it?
You can have more than one computer running at a time, doing many works simultaneously.If you get any errors, or crash the Hard disk of your computer, you can just delete the Hard Disk image and create a new one.You can test any new softwares without crashing your real computer, etc, etc...
Steps for Downloading and Using Qemu:
- Download Kqemu (QEMU Acceleration Module)-Optional:
- Unzip Qemu and install Kqemu.
- Now, Open Start Menu, select Run and open command prompt by typing cmd.
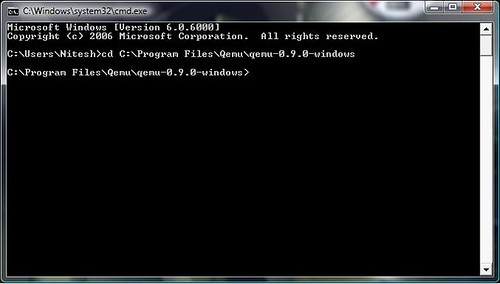
- Move to the qemu-0.9.0-windows directory (where you unzipped the rar file).In my case it is- C:\Program Files\Qemu\qemu-0.9.0-windows. So I typed cd C:\Program Files\Qemu\qemu-0.9.0-windows
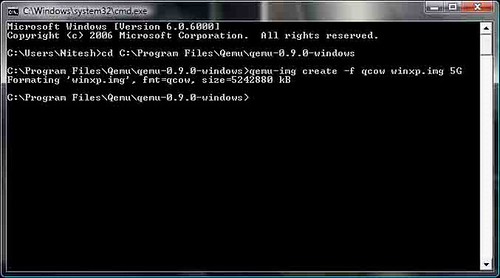
- Copy and paste this code in the command prompt, to create a Virtual Hard Disk Drive image.If you have to install Windows XP, create Hard Disk Image with-
qemu-img create -f qcow winxp.img 5G
Where, 5G specifies the amount of space you want to allot to your Virtual Hard Disk(In GB)-you can make it 10G, 20G, and so on.
- Now close the command prompt, and go to the qemu directory through My Computer.
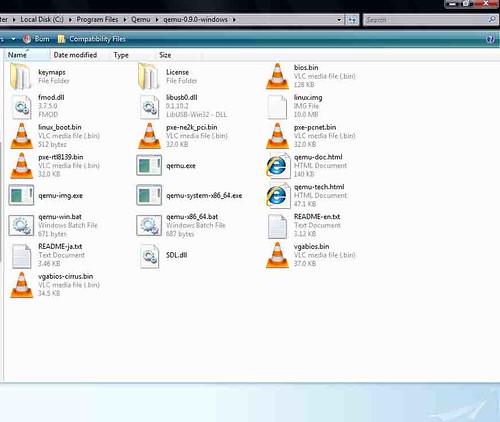
- Create a new text file using Notepad (For installing Windows XP.Put this code In a single line, or modify if you wish):
qemu.exe -kernel-kqemu -L . -m 512 -hda winxp.img -boot d -soundhw all -localtime -M pc -cdrom //./d:
Where, -m 512 is the amount of RAM you want to allot to your Virtual Computer(here, 512 MB)- you can change it to any value, which is supported by your Operating System, and "d:" is your optical drive's letter.
Where, -m 512 is the amount of RAM you want to allot to your Virtual Computer(here, 512 MB)- you can change it to any value, which is supported by your Operating System, and "d:" is your optical drive's letter.

- Save the text file as qemu-winxp.bat (Or any other name with .bat extension).
- Now start the Virtual pc by double clicking qemu-winxp.bat
- Now start the Virtual pc by double clicking qemu-winxp.bat
- Insert Windows XP cd and proceed with the installation.
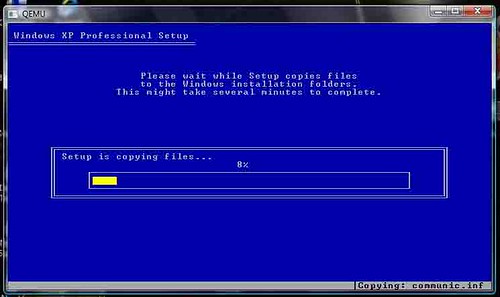
- When the installation has completed, edit the batch file you created(here, qemu-winxp.bat),by right-clicking the file and selecting Edit option.Select all the text, and delete it.Now copy and paste this code (just copy and paste, or modify a bit if you wish)-
qemu.exe -kernel-kqemu -L . -m 512 -hda winxp.img -boot c -soundhw all -localtime -M pc -cdrom //./d:
You can observe that there is no change in the original code except one letter. That is "-boot c" instead of "-boot d", as you have to boot from your hard disk drive, and not from your CD drive(you already installed XP).Here again, -m 512 is the amount of RAM you want to allot (here, 512 MB)- you can change it to any value, which is supported by your Operating System, and "d:" is your optical drive's letter.
- Now save this file and close the Text Editor.
- You can run the Virtual XP whenever you want, by clicking on the batch file or on the shortcut you might have created.
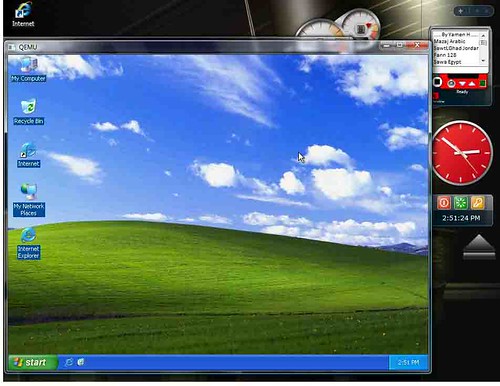
Some Tips:
- Enable the Full Screen Mode By Pressing the Shortcut Ctrl+Alt+f.Press it again to go to window mode.
- Click anywhere in the Qemu window to let it grab the mouse pointer.Press Ctrl+Alt to exit grab.
- Never exit Qemu by closing the main window. If you want to exit without shutting down the Virtual Computer, do that by exiting the DOS file running along with Qemu main window.
Subscribe to:
Posts (Atom)